#1 Cosmetic Dentist Near Me Los Angeles | Top-Quality Veneers, Invisalign, & Implants Dentistry

Cosmetic dentistry is a field of restorative & reconstructive dentistry that focuses on enhancing the appearance of a person’s smile and teeth through various dental procedures like Porcelain Dental Veneers, Invisalign Clear Aligner Braces, and Dental Implants. It has gained immense popularity over the years, especially near me in Los Angeles, which is known for its celebrity culture and the desire for a perfect smile near me at cost-friendly prices.
Cosmetic dentistry in Los Angeles offers a wide range of treatments to enhance the appearance of the teeth, gums, and mouth. These treatments are designed to correct a variety of dental problems such as discolored, misshapen, crooked, or missing teeth.
Dr. Nik is one of the most renowned and experienced cosmetic dentists in Los Angeles. With years of experience in the field of cosmetic dentistry, Dr. Nik has helped countless patients achieve beautiful, healthy smiles, using the latest technology and advanced techniques to provide personalized care that is tailored to meet their unique needs.
The Best Invisalign, Dental Implants, and Dental Veneers in Los Angeles
Why Choose Dr. Nik as Your Cosmetic Dentist Near Me in LA, CA for Aesthetic Teeth?
There are many cosmetic dentists in Los Angeles, but Dr. Nik stands out as one of the best. Here are just a few reasons why you should choose him as your cosmetic dentist:
- Expertise: Dr. Nik has years of experience in the field of cosmetic dentistry and has helped countless patients achieve beautiful, healthy smiles.
- Personalized care: Dr. Nik believes in providing his patients with personalized care that is tailored to meet their unique needs and goals.
- State-of-the-art technology: Dr. Nik uses the latest technology and advanced techniques to provide the best possible care.
- Aesthetic eye: Dr. Nik has a keen eye for aesthetics and works closely with his patients to design a treatment plan that will help them achieve a beautiful, natural-looking smile.
- Compassionate care: Dr. Nik is known for his compassionate, caring approach to dentistry and his commitment to helping his patients achieve the best possible outcomes.
If you’re looking for a cosmetic dentist in LA, Dr. Nik should be at the top of your list. With years of experience in the field of cosmetic dentistry and a commitment to personalized, compassionate care, he has helped countless patients achieve the beautiful, healthy smiles they deserve. Contact LA Dental Experts today to schedule a consultation with Dr. Nik and learn more about how he can help you achieve the smile of your dreams.
What Are You Waiting For...
MAKE AN APPOINTMENT
The Finest Esthetic Dentists Specialized in Cosmetic Dental Care in LA
Dr. Nik’s passion for the latest in cosmetic dentistry began early in his career, and he has since become one of the most sought-after cosmetic dentists in Los Angeles. His expertise in the field of cosmetic dentistry is evident in the stunning smiles he has helped his patients achieve.
One of the key factors that set Dr. Nik apart as a cosmetic dentist is his keen eye for aesthetics. He has a deep understanding of the factors that contribute to a beautiful, healthy smile, and he works closely with each patient to design a treatment plan that is tailored to meet their unique needs.
Dr. Nik offers a comprehensive range of the best cosmetic dentistry services, including teeth whitening, porcelain veneers, dental implants, and he is committed to providing personalized care that is tailored to meet the unique needs of each patient.
What OUR Clients Say about US

Samantha

Michael

Mina
Joseph
Maria
Julian
Dr. Nik's Approach to Cosmetic Dentistry in Los Angeles, California
He believes in providing his patients with personalized, compassionate care that is tailored to meet their unique needs, and he is committed to helping them achieve the best possible outcomes.
Dr. Nik takes the time to get to know his patients and understand their unique needs and goals. He uses this information to design a customized treatment plan that is tailored to meet their specific needs, and he works closely with them throughout the entire process to ensure that they are comfortable and satisfied with their results.
He also believes in using the latest technology and techniques to provide the best possible care. Dr. Nik invests in the latest dental technology and stays up-to-date with the latest advancements in the field of cosmetic dentistry, ensuring that his patients receive the best possible care.
One of the reasons why cosmetic dentistry is so popular in Los Angeles is the emphasis on appearance in the entertainment industry. Many celebrities in Hollywood have undergone cosmetic dental procedures to achieve a perfect smile. This has led to a trend where people want to emulate the smile of their favorite celebrity, leading to an increased demand for cosmetic dentistry salary and services.
Have a Look at
What Procedures Do Celebrity Cosmetic Dentists Do in Los Angeles, CA?
Invisalign
Invisalign is a type of clear aligner system that can help straighten teeth without the use of traditional braces. Invisalign aligners are made from a clear, BPA-free plastic material that is virtually invisible when worn. The aligners are custom-made to fit each patient’s teeth, and they are worn for 20-22 hours per day. Patients switch to a new set of aligners every two weeks to gradually shift their teeth into the desired position.
Invisalign is a popular option for adults and teenagers who want to improve the appearance of their smile without the discomfort and inconvenience of traditional metal braces. It is also a great option for patients who have had braces in the past but have experienced relapse.
Porcelain Veneers
Porcelain veneers are thin, custom-made shells that are placed over the front surface of the teeth to improve their appearance. Veneers are made from a durable, tooth-colored porcelain material that can be shaded to match the surrounding teeth. They are typically used to correct teeth that are stained, chipped, cracked, or misaligned.
The process of getting porcelain veneers typically involves two appointments. During the first appointment, the dentist will prepare the teeth by removing a small amount of enamel. The dentist will then take impressions of the teeth, which are sent to a dental lab where the veneers are made. The second appointment involves the placement of the veneers, which are bonded to the teeth using a strong dental adhesive.
Metal and Ceramic Dental Implants
Dental implants are a popular option for patients who have lost one or more teeth. Implants are artificial tooth roots that are made from a biocompatible material, such as titanium or zirconia. They are placed into the jawbone through a surgical procedure and serve as a sturdy base for a dental crown, bridge, or denture.
Metal and ceramic dental implants are both popular options in Los Angeles. Metal implants are typically made from titanium and are known for their durability and strength. Ceramic implants, on the other hand, are made from a white-colored zirconia material that blends in well with the surrounding teeth.
The process of getting dental implants typically involves several appointments over a period of several months. During the first appointment, the dentist will place the implant into the jawbone. The implant will then be left to fuse with the bone tissue in a process called osseointegration. Once the implant has fused with the bone, the dentist will attach an abutment, which serves as a connector between the implant and the dental restoration. The final step is the placement of the dental crown, bridge, or denture.
Dental Crown
A dental crown is a tooth-shaped cap that is placed over a damaged or decayed tooth to restore its shape, size, strength, and appearance. Crowns are typically made from a durable, tooth-colored material, such as porcelain or ceramic.
The process of getting a dental crown typically involves two appointments. During the first appointment, the dentist will prepare the tooth by removing any decay or damage. The dentist will then take impressions of the tooth, which are sent to a dental lab where the crown is made. In the meantime, the patient will wear a temporary crown to protect the tooth. During the second appointment, the dentist will remove the temporary crown and replace it with the permanent crown, which is bonded to the tooth using a strong dental adhesive.
Dental crowns can be used to treat a variety of dental problems, including severely decayed or damaged teeth, teeth with large fillings, teeth that have undergone a root canal, and teeth that are misshapen or discolored.
Dental Bridge
A dental bridge is a dental restoration that is used to replace one or more missing teeth. The bridge is made up of two or more dental crowns that are placed over the teeth on either side of the gap, with a pontic (false tooth) in the middle.
The process of getting a dental bridge typically involves two appointments. During the first appointment, the dentist will prepare the teeth on either side of the gap by removing a small amount of enamel. The dentist will then take impressions of the teeth, which are sent to a dental lab where the bridge is made. In the meantime, the patient will wear a temporary bridge to protect the teeth. During the second appointment, the dentist will remove the temporary bridge and replace it with the permanent bridge, which is bonded to the teeth using a strong dental adhesive.
Dental bridges can help improve the appearance of the smile, restore the ability to chew and speak properly, and prevent the remaining teeth from shifting out of place.
Snap on Smile
Snap on Smile is a removable dental appliance that is designed to improve the appearance of the smile. The appliance is made from a thin, durable material that fits over the existing teeth to create the appearance of a straighter, whiter smile.
Snap on Smile is a popular option for patients who are looking for a temporary, affordable solution to improve the appearance of their smile. The appliance is easy to clean and can be removed for eating and cleaning.
Dental Bonding
Dental bonding is a cosmetic treatment that uses a tooth-colored resin material to improve the appearance of the teeth. Bonding can be used to repair chipped, cracked, or discolored teeth, and can also be used to fill in gaps between teeth.
The process of getting dental bonding typically involves a single appointment. The dentist will prepare the tooth by roughening the surface and applying a conditioning liquid. The dentist will then apply the bonding material and shape it to the desired shape. The material is then cured using a special light and polished to match the surrounding teeth.
Dental bonding is a cost-friendly and non-invasive way to improve the appearance of the teeth, but it is not as durable as other cosmetic treatments such as porcelain veneers or dental crowns.
Gold Grillz and Diamond Jewel Teeth
Gold grillz and diamond jewel teeth are a popular trend in cosmetic dentistry. These dental appliances are made from gold, silver, or other precious metals, and can be customized with diamonds, gemstones, or other embellishments.
The process of getting gold grillz or diamond jewel teeth typically involves several appointments with a cosmetic dentist or a specialist who specializes in these types of dental appliances. The dentist will take impressions of the teeth and work with the patient to design the custom grill or jewel teeth. The final product is then created and fitted to the patient’s teeth.
While gold grillz and diamond jewel teeth can be a fun and unique way to personalize the appearance of the smile, they are not recommended for long-term use as they can cause damage to the teeth and gums.
Professional Teeth Whitening Service
Professional teeth whitening is a popular cosmetic treatment that can help brighten stained or discolored teeth. Teeth whitening can be done in the dentist’s office or at home using custom-made whitening trays.
In-office teeth whitening typically involves the application of a strong whitening gel to the teeth, which is activated by a special light. The process can be completed in a single visit, and can provide dramatic results in just one session.
At-home teeth whitening involves the use of custom-made trays that are filled with a whitening gel and worn for a specified amount of time each day. At-home whitening typically takes several weeks to achieve the desired results, but it is a more convenient and affordable option for many patients.
Professional teeth whitening is a safe and effective way to improve the appearance of the smile, but it is important to consult with a dentist before undergoing any whitening treatment to ensure that it is safe and appropriate for your individual needs.
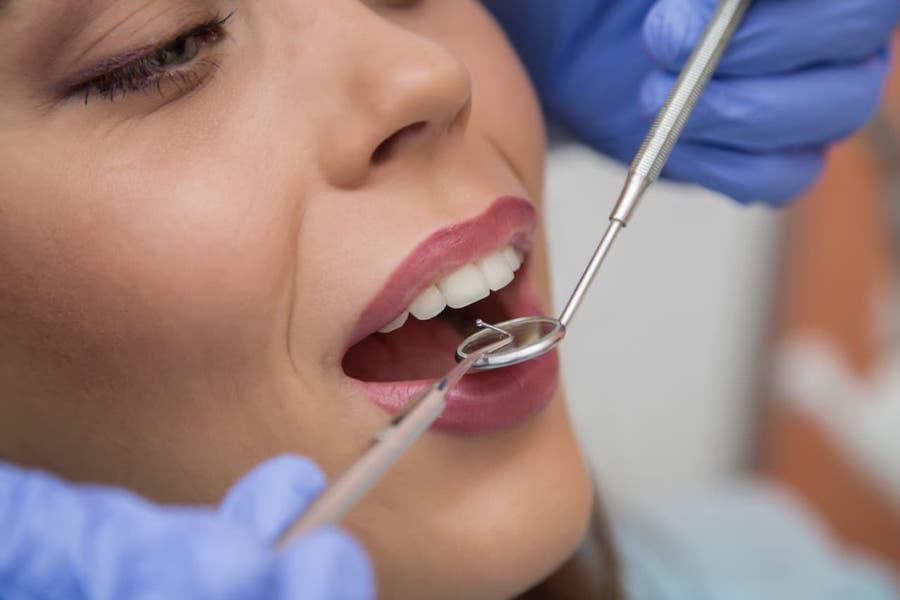
Cosmetic Dental Care Provider & Procedures for Dental Healthcare
When considering cosmetic dentistry, it’s essential to understand what to expect from the procedure. The specifics of each procedure will vary depending on the treatment. However, here are some general expectations to keep in mind:
Consultation:
Preparation:
Procedure:
Recovery:
Follow-Up:
What Are You Waiting For...
MAKE AN APPOINTMENT
Benefits of Cosmetic Dentistry in LA, CA
1. Improved Self-Confidence
2. Better Oral Health
3. Long-Lasting Results
4. Improved Functionality
How Long Do Cosmetic Teeth Last in Los Angeles, California?
The lifespan of cosmetic dental procedures varies depending on the specific procedure and the patient’s oral hygiene habits. Here is a general overview of the lifespan of different cosmetic dental procedures:
Teeth Whitening
Porcelain Veneers
Dental Bonding
Invisalign
Dental Implants
Dental Crowns
Dental Bridges
Gum Contouring
Snap on Smile
Inlays and Onlays
Gold Grillz
Diamond Jewel Teeth
Orthodontic Treatment
Results of Cosmetic Dentistry Procedures in LA, CA
The results of cosmetic dentistry can vary depending on the procedure and the individual’s unique situation. However, most patients can expect to see significant improvements in the appearance of their smile. Cosmetic dental treatments can help correct a wide range of issues, including:
- Discolored or Stained Teeth: Teeth whitening can help remove stains and discoloration from the teeth, creating a brighter, more youthful-looking smile.
- Misaligned Teeth: Invisalign and other orthodontic treatments can be used to straighten teeth, creating a more even smile.
- Damaged or Missing Teeth: Dental implants, veneers, and other restorative procedures can be used to repair or replace damaged or missing teeth.
- Gummy Smiles: Gum contouring can help reshape the gums to create a more balanced, aesthetically pleasing smile.
Reasons to Pursue Cosmetic Dentistry in Los Angeles, California
There are many reasons why a person might choose to pursue cosmetic dentistry. Some of the most common reasons include:
- Improving Self-Confidence: A beautiful, healthy-looking smile can help boost self -confidence and improve overall well-being. By investing in cosmetic dental treatments, patients can feel more comfortable and confident in their appearance, which can positively impact many areas of their life.
- Correcting Dental Issues: Many cosmetic dental treatments can also help correct dental issues that may cause discomfort or pain. For example, dental implants can be used to replace missing teeth, which can improve oral function and prevent bone loss.
- Enhancing Career Opportunities: In some professions, having a polished and professional appearance is essential. A beautiful smile can help improve a person’s appearance and make them more competitive in the job market.
- Special Occasions: Many patients also pursue cosmetic dental treatments before special occasions, such as weddings or reunions, to look and feel their best.
Characteristics of a Cosmetic Reconstructive Dentist in LA, CA
In addition to the qualifications listed above, there are certain characteristics that make a great cosmetic dentist in Los Angeles. Some of these include:
- Attention to Detail: A cosmetic dentist should have a keen eye for detail and be able to create a natural-looking result that complements the patient’s facial features.
- Communication Skills: A cosmetic dentist should be a good communicator, able to listen to the patient’s concerns and goals and explain the various treatment options in a clear and understandable way.
- Artistic Ability: Cosmetic dentistry is as much an art as it is a science. A cosmetic dentist should have a strong sense of aesthetics and be able to create beautiful, natural-looking results.
- Empathy and Compassion: A good cosmetic dentist should be empathetic and compassionate, able to understand the patient’s concerns and make them feel comfortable and relaxed during their visit.
Choosing a Cosmetic Dentist in LA, CA
Choosing the right cosmetic dentist in Los Angeles is an important decision that should not be taken lightly. Some tips for choosing a cosmetic dentist include:
- Ask for Referrals: Ask family and friends if they know of any good cosmetic dentists in the area. You can also check online reviews and ratings to get an idea of other patients’ experiences.
- Check Credentials: Make sure the cosmetic dentist you are considering has the necessary qualifications and experience in the specific procedures you are interested in.
- Schedule a Consultation: Schedule a consultation with the cosmetic dentist to discuss your goals and concerns. This will give you an opportunity to meet the dentist in person and ask any questions you may have.
- Review Before-and-After Photos: Ask to see before-and-after photos of the dentist’s previous patients to get an idea of their work.
- Evaluate the Office: Pay attention to the cleanliness and organization of the dental office, as well as the friendliness and professionalism of the staff.
- Consider Cost: Cosmetic dental procedures can be expensive, so make sure you understand the costs associated with the procedures you are considering.
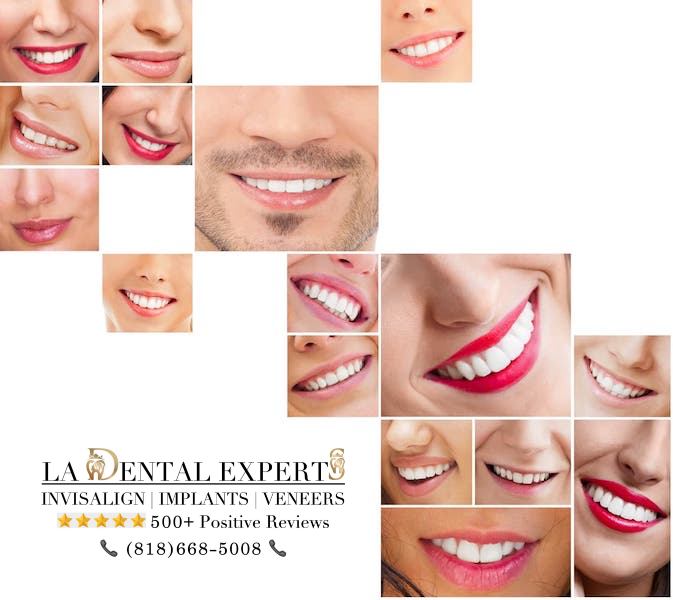
Cosmetic Dentist Before And After Smile Gallery


Have a Look at
How Much Does a Cosmetic Dentistry Cost in Los Angeles, California?
The cost of cosmetic dentistry in Los Angeles, California can vary depending on the type of treatment, the complexity of the case, the dentist’s experience and qualifications, and the location of the practice.
Invisalign Cost
Porcelain Veneers Cost
Dental Implants Cost
Dental Crown Cost
Dental Bridge Cost
Snap-on Smile Cost
Dental Bonding Cost
Gold Grillz and Diamond Jewel Teeth Cost
Professional Teeth Whitening Service Cost
Table Comparison of Different Cosmetic Dentistry Procedures Cost in Los Angeles
| Procedure | Average Cost |
|---|---|
|
Invisalign |
$3,000-$8,000 |
|
Porcelain Veneers |
$1,500-$3,000 Per Tooth |
|
Dental Implants |
$3,000-$6,000 Per Tooth |
|
Dental Crown |
$800-$2,500 Per Tooth |
|
Dental Bridge |
$2,500-$5,000 Per Tooth |
|
Snap on Smile Veneers |
$1,000-$2,500 |
|
Dental Bonding |
$300-$800 Per Tooth |
|
Gold Grillz |
$800-$2,500 Per Tooth |
|
Diamond Jewel Teeth |
$500-$1,500 Per Diamond |
|
Professional Teeth Whitening |
$300-$1,200 |
In conclusion, cosmetic dentistry is a rapidly growing industry in Los Angeles that offers a wide range of procedures to improve the appearance of the teeth, gums, and mouth. From teeth whitening to complete smile makeovers, there are many options available to help patients achieve the smile they desire. With the accessibility of payment plans and financing options, cosmetic dental procedures are becoming more affordable and accessible to a wider range of people.
When choosing a cosmetic dentist near California, USA, it is important to choose a qualified and experienced professional with a proven track record of success. With realistic expectations and careful consideration, cosmetic dentistry can greatly enhance the appearance of the smile and boost self-confidence.
For those seeking the best cosmetic dentist in Los Angeles, Dr. Nik at LA Dental Experts is a top choice. With his extensive experience, training, and commitment to patient satisfaction, Dr. Nik has helped numerous patients achieve their dream smiles. If you are interested in improving the appearance of your smile, schedule a consultation with LA Dental Experts today.
What Are You Waiting For...
MAKE AN APPOINTMENT
RECENT BLOG POSTS
Copyright © 2023 LA Dental Experts